Home
Comptech Stainless Steel Braided Brake Lines Install
Taken from the Acura-TL.com
forum
-Parts: 1 set of Comptech Stainless Steel Brake Lines (4 lines
total), 0.5L of DOT4 Brake Fluid, Bleeder Hose (or similar hose from aquarium
store)
-Total cost: $120
A little background on what these things are and what they do.
The stainless steel lines replace the stock rubber brake lines and offer a
stiffer brake feeling. No more spongy slow reacting brakes. They do this because
the stock rubber lines will flex under hydraulic pressure (think of a balloon).
These lines, which are actually Teflon lines, have to be braided with steel
because Teflon is highly resistant to flexibility...but that lends to it being
brittle, so if hit with a rock in the wheel well, it will shatter. So because
the stainless steel braid covers the Teflon to protect it, most Teflon lines
are now just called stainless steel lines. This kit came with relatively little.
It had the 4 lines, the 4 screws that screw into the calipers, and 8 crush
washers
Here's the parts you get with the Comptech Kit:

1) Jack up car, place on jackstands, and remove all 4 wheels.
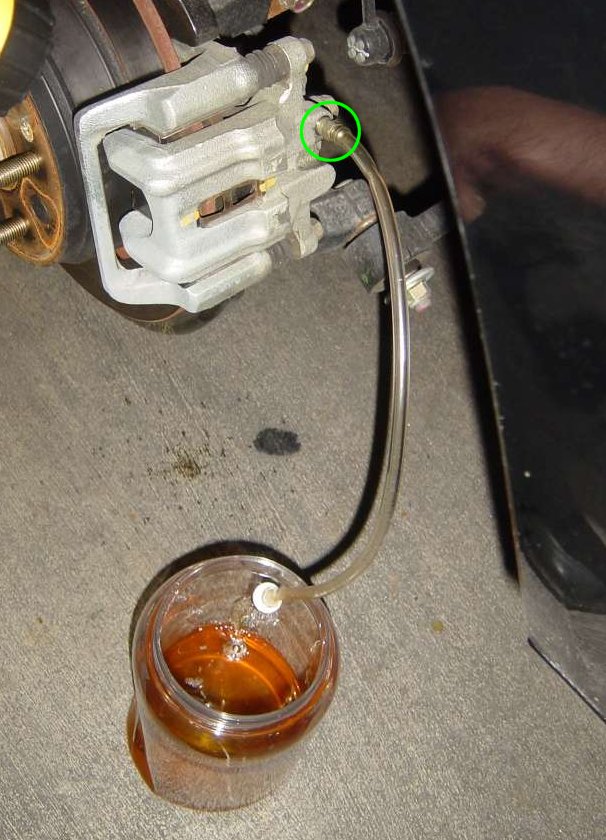
2) Place bleeder hose onto nipple of caliper valve, turn valve
1/4 turn to open. You see the valve and the nipple clearly here.
3) With short strokes, pump brake pedal to pump brake fluid
into container to be disposed of later. Do not push the pedal all the way
down when pumping, as you'll ruin the master cylinder. So we pumped all the
fluid out into that plastic container, then we were ready to remove the old
lines and install the new ones!
4) Remove stock rubber lines:
-
a. Pry off metal clips at top of stock lines with fingers
or back of hammer
-
b. Unscrew stock feeder hoses from stock brake lines
-
c. Unscrew bolt holding stock lines to bracket behind rotors
-
d. Unscrew bolt at bottom of stock lines from caliper and
remove stock lines
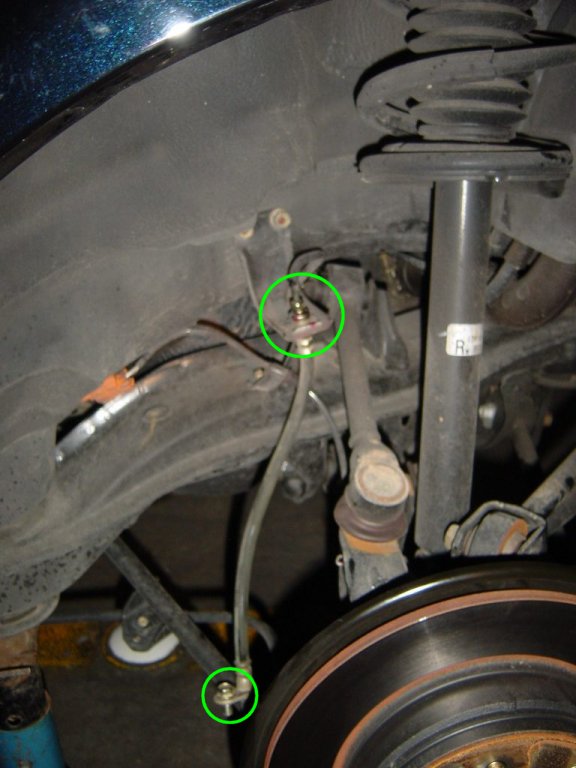
Here's a good picture of the stock rubber lines. Removing the
old lines and installing the new ones was an extremely easy process. The brake
line is held in 3 places. First, it is attached to that top bracket sticking
out in the wheel well by a small metal clip, which you may not be able to see.
By pulling the clip out with your fingers, or if it's on tight with the back
of a hammer, the line is free of the bracket. Then it just needs to be unscrewed
from the stock line feeding it. The second place that the line is held, is in
a bracket close to the rear of the rotors, and it's held in by one bolt. Finally,
the line is screwed into the caliper where the line terminates into an banjo
bolt. In the picture below you see the stock line dangling after having removed
the screw holding it in behind the rotor.
5) Install SS lines (reverse of #4):
-
a. Screw replacement bolt through washers and SS lines eyehole
into caliper
-
b. Screw bolt through rubber bracket on SS lines into metal
bracket behind rotors
-
c. Screw stock feeder hoses into SS lines
-
d. Push on metal clips to hold SS lines in place on metal
brackets
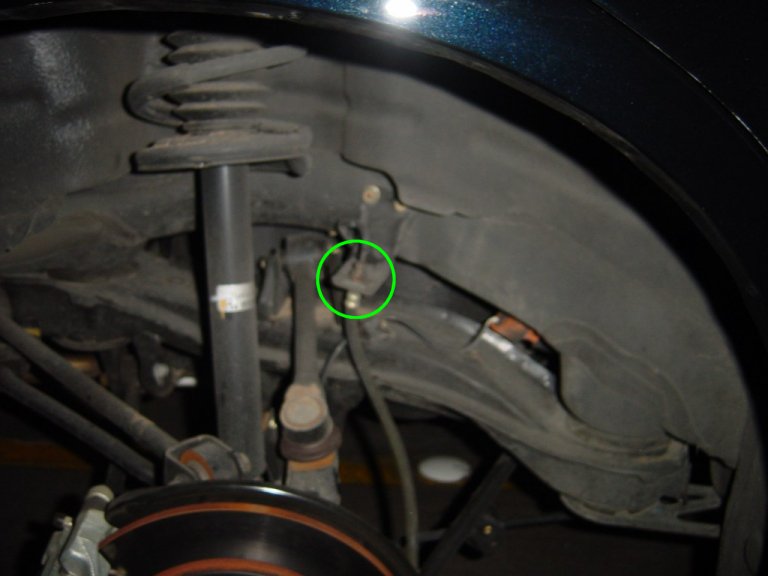
To help orient you, the picture was taken in the left rear wheel
well, by pointing the camera toward the axle from the left side of the wheel
well (if you're facing the wheel well). I have already installed the stainless
steel brake lines with the new screws and crush washers, and you can see where
the lines (which have a rubber bracket that's attached to them) screw into the
metal bracket behind the rotor.
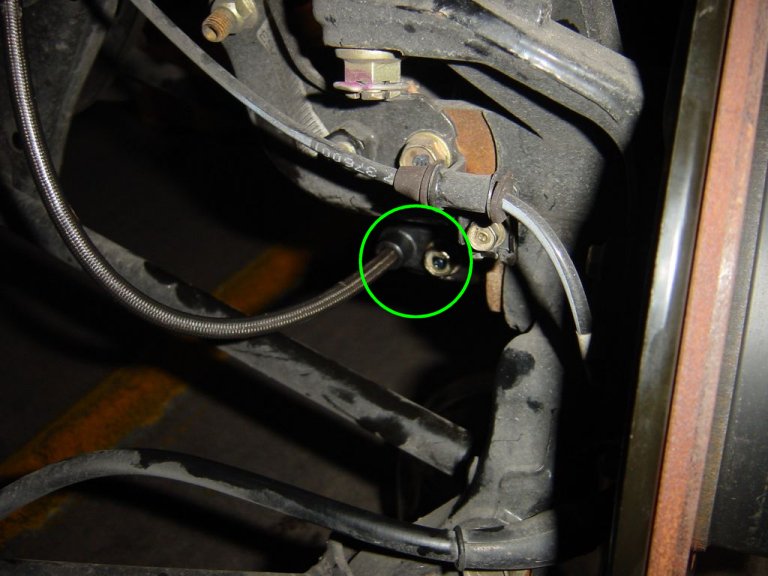
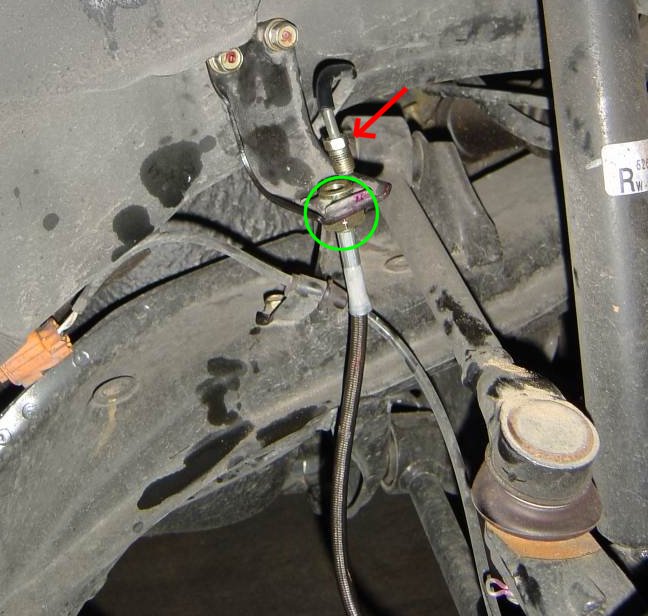
Another picture with the new brake lines installed. You can
clearly see the top of the brake line is held in by a metal clip in the metal
bracket. Just above the brake line is the stock feeder line that will be screwed
into the stainless steel line. A good tip, screw in the stock feeder line
before clipping in the stainless steel lines.
6) Bleed brakes (repeat for all 4 calipers):
-
a. Position friend by brake fluid reservoir (right rear
of engine bay) to refill reservoir, or do it periodically yourself
-
b. Place bleeder hose over nipple on caliper and open valve.
Make sure all other valves are closed.
-
c. Have friend pump brake with very short strokes, while
you watch the bleeder hose for air bubbles. When no more air/air bubbles
emerge from the valve, stop pumping brake and close valve with 1/4 turn
twist without removing the bleeder hose!
-
d. Repeat for all 4 calipers
7) Test out brakes and you're done!


