Home
  Links
transparent

4AGE 20V Blacktop

transparent transparent

Diary of Swap
Wiring
Transmission
Exhaust
Cooling System
Miscellaneous
Dyno

transparent

85/6 4AGE -> 4AGZE

transparent transparent

Wiring

transparent

Air Intake Filter
Alternator
Clutch Slave Cylinder
Clutch Master Cylinder
Coolant Flush
Distributor O-Rings
Exhaust Manifold
Fuel Filter
Fuel Pump Cut-off Switch
Ignition Timing
Oil Cooler Hoses
Oil Filter Adapter O-Rings
Oil Pan Gasket
Oxygen Sensor
Radiator Removal
Starter
Thermostat
Throttle Body Cleaning
TPS Adjustment
Water Pump

transparent

87+ Brake Upgrade
Caliper Rebuild-Front
Caliper Rebuild-Rear
Dust Shield Removal
Parking Brake Cable
SS Braided Brake Line

transparent

Ball Joint Replacement
Bushings Install - Front
Bushings Install - Rear
Steering Knuckle Removal
Struts/Springs - Front
Struts/Springs - Rear
Sway Bar End Links

transparent

87+ Antenna Replacement
Clear Turn Signals - Front
Clear Turn Signals - Rear
Door Hinges
Interior Door Triangles
Interior Headliner Painting
Interior Trim & Light Lens
Power Window Regulator
Rekeying Trunk Lock
Rust PM - Battery Bracket

Rust PM - Front Wheel Wells
Seats - MK3
Seats - Aftermarket
Shift Boot

SideMarker Mod

Sunroof Rattle
Wiper Switch

transparent

2006 Austin
2005 Austin
2005 Topeka NA2005
2004 Galveston
2004 Chattanooga SE2004
2003 Galveston
2002 Austin

transparent

Suspension Setup Pics
My MR2 Diary
Latest Pics of My MR2


20V Blacktop Project - Day 5

My first full day working on the project. Got a lot done.

Got both harnesses disconnected and out of the car:

Some pics of the engine bay and interior with no wiring harneses.


So, engine is ready to pull. Decided to remove the engine from above since there are a few crossmembers at bottom of engine bay that would be a pain to remove. To give us some more room to remove the engine, took a hacksaw to the front of the chassis, where the radiator/AC condensor mount.


Will borrow an engine hoist from a friend, so can't pull the engine till that gets here early this week. I'll start messing with the wiring harnesses in the meantime.

Just a pic of the mess in my garage of all the parts I've removed.


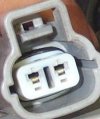
Some of the connectors I removed...

Windshield Washer Pump Blue/Y Blue Pink    
Ignition Coil Blk/W Blk/R      
Ground Near Coil Blk/W W/Blk      
Ignitor Blk/R Blk Blk/W Y/G Blue/Y
AC Pressure Sensor G Blue/R G/Blk Blk/Y  
Distributor W G R Blk  
Water Temp Sensor B W      
Water Temp Sender Gauge          
Water Temp Switch G        
Speedo R/Blk R/Blue      


Home   •   Links  •   Email
(remove NOSPAM from resulting email address)
Thanks for Visiting! - Eric Southers

Disclaimer: This web page in no way replaces the MR2 repair manual. Follow what it says before me. The purpose of this page is to give you a better pictorial description of what to do. I cannot be held responsible for any mishaps caused by this web page.