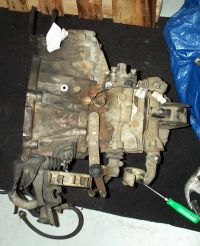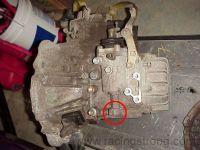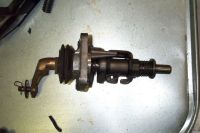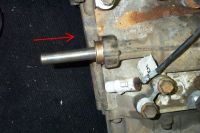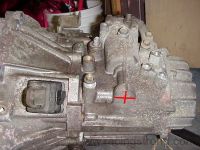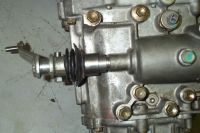
FWD Transmission Conversion for the MR2Here's what you will need to do to convert a front-engine FWD transmission to work in the mid-engined MR2, specifically the C56 transmission. If you sit the stock C50/52 next to the C56, you can easily see what needs to be done to the new tranny. The red circled area is a point of concern on the newer C56s (Blacktop). It doesn't have a 'flange' at the end of the gear selector shaft housing. None of the Silvertop C56s are known to be like this. It will take a bit of machining to do this job correctly. If this part of your C56 looks like the C52, the conversion will be much simpler.
In either case, you will need to purchase a new selector shaft oil seal from Toyota. I forget how much it was, but was under $10 I'm sure. Part #: 90311-15003
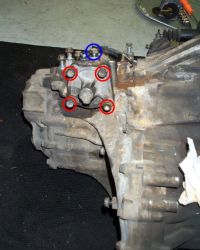
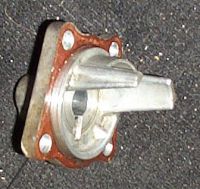
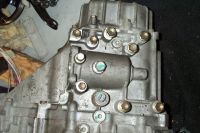
1) Start by removing the slave cylinder lines and brackets, as well as the engine mounts on both transmissions. Remove the gear selector linkage mounted to the trannies. 2) Now have the tranny in the neutral position. Twist the shaft into the middle position and push or pull it to the middle position. On the C52, Remove the four 14mm bolts holding the end plate in place (red). Also remove the 14mm bolt that aligns the shaft (blue). Pull out the end plate, you will be reusing it on the C56.
On the C56, Remove the four 14mm bolts holding the shaft in place. As well as the bolt on top of the housing. These bolts are in the same place as the above pictured C52. Slide the selector shaft out. The C56 is now ready for the conversion.
3) Now, on the C52 remove the 12mm nut on the pin holding the lever to the shaft. Take a hammer to the end of the pin to nudge it out. Remove the dust boot from the tranny oil seal. Then the handle should easily come off the shaft.
4) Now, push the shaft out toward the endplate side. May need a nudge from the palm of your hand. You will be reusing this shaft in the C56.
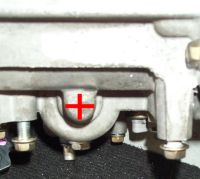
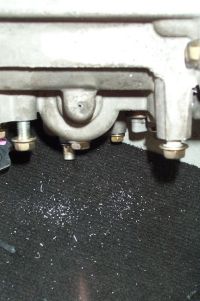
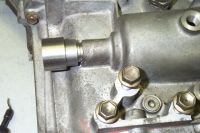
5) In order for the shaft to fit through the C56 you need to drill a hole on the opposite end of the shaft housing. Measure the proper point to drill the hole. Here's what it looks like on the Blacktop C56: Here's the Silvertop C56:
6) Drill a pilot hole with a small drill bit. Make sure to be parallel with the shaft housing. Turn the tranny so that the housing is on the bottom. This insures that few shavings will enter the transmission gears. You may also want to stuff something inside the other end to collect any other shavings.
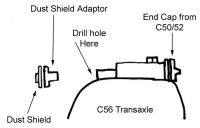
7) For the older C56 transmission, increase the size of the hole so that the new oil seal can be pressed in. I'm not sure of it's size, so you'll need to measure it yourself. The seal is a press fit, so make sure the size of the hole is smaller than the seal. Tap the seal in place with a mallet making sure it goes in square. Clean up as much of the fillings inside the housing as you can. Goto Step 10. 8) For the newer C56, increase your bit size until the shaft fits. My selector shaft was just over 1/2" wide. So I ended up using a 1/2" bit and then a smaller one to ream it just a bit. Smooth with very fine grit sand paper. You will most likely need to make this hole larger later on, for the oil seal adapter that you need to make. 9) Here's a diagram of a possible oil seal, courtesy of Bill Strong: And here's what mine ended up looking like after having a friend machine it out of SS stock. Go here for a lot more pics. 10) Once you have the seal pressed in, fit the shaft through the endplate side. It may take a little fidgeting to get the pieces on the shaft to line up properly with the forks inside. Slide the dust boot in place. Replace the lever and bolt and the endplate. Benchtest your new linkage and you are ready to put everything back on and remount the tranny. |
|||||||
| Home • Links •
Email Disclaimer: This web page in no way replaces
the MR2 repair manual. Follow what it says before me. The purpose of
this page is to give you a better pictorial description of what to do.
I cannot be held responsible for any mishaps caused by this web page.
|
