Rear Caliper Rebuld Page 1/2Page 1 and 2 List of parts you will need:
Here's the SST that you need if you want to do the full rebuild on the rear calipers.
Rear Disassembly 1) Remove caliper from vehicle. Skip to step #4 if you left the mounting bracket on the rotor.
2) Remove 12mm slider bolt.
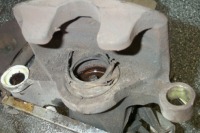
3) Pivot the caliper mounting bracket and remove it from the caliper. Here's the caliper, and check out that ratty piston boot!
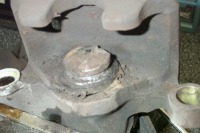
4) Remove the main pin boot with a screwdriver. It may take a hammer to urge it off.
5) Remove the sliding bushing and boot.
6) Peel the cylinder boot down off the piston groove.
7) Using a pair of need nose pliers turn the piston counter-clockwise out of the cylinder. Just a pic of the piston removed.
8) Remove the cylinder set ring with a screwdriver. You may need to dig around a little to find it. Then remove the cylinder boot.
9) Insert the SST onto the adjusting bolt, and lightly tighten it with a 14mm deepwell socket.
10) You should be able to see the snap ring down inside the cylinder. Take a set of long, skinny snap ring pliers and remove the snap ring. I used a Craftsmen #30353 and was able to remove it the first time.
11) Pull out the SST, spring retainer, spring, spring plate, and stopper together with the adjusting bolt. May take some wiggling with a pair of pliers. Here's the empty cylinder.
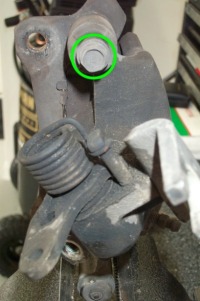
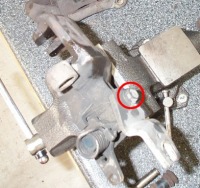
12) Onto the parking brake. Remove the 14mm bolt and cable support bracket.
13) Remove the torsion spring with a screwdriver or pair of pliers. Remove the 17mm bolt from the parking brake crank. Not a necessary step, but if you want, remove the crank bracket from the crank. A 2 jaw puller may be necessary. Pull out the crank.
14) With a screwdriver remove the parking brake crank boot. A hammer may be needed to urge it off. The empty crank cylinder.
15) Another unnecessary step, but you can remove the stopper pin, that holds the torsion spring in place. A set of pullers or a pin punch works.
Here's all the parts removed. And here's the dissambled adjusting bolt. Pull off the tiny o-ring on the head of the adjustment bolt.
Clean up all reusable parts with new brake fluid or denatured alcohol.
Goto Page 2 for the installation of the rebuild kit. |
|
| Home • Links •
Email Disclaimer: This web page in no way replaces
the MR2 repair manual. Follow what it says before me. The purpose of
this page is to give you a better pictorial description of what to do.
I cannot be held responsible for any mishaps caused by this web page.
|


