| * Courtesy of verno-dub
and ITA-MR2 (Norm) of the MR2
Owners Club.
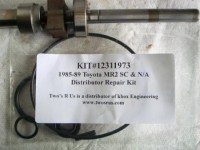
First off I'd like to thank Jody
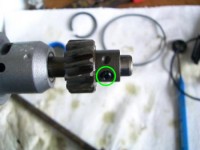
(K-Box) for the seal kit, it saved my $200 over a rebuilt
dizzy. I would also like to thank Norm (ITA-MR2) because im
gonna quote the living bejeezus out of him, out of sheer laziness
on my part to write.
Shall we begin?
1) Norm: To start with, turn the engine to top dead center
(always do this to pull the distributor). You do that by making
sure the "0" timing mark on the pulley lines up
with the marker pin. Then look down in the oil filler hole.
You should see a dimple in the intake cam. The dimple should
be split by the "straight edge" of the oil filler.
2) Unsnap the rubber boot over the distributor and remove
the spark plug wires from the distributor.
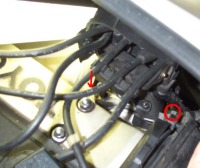
3) Remove the two 12mm bolts holding the distributor in the
engine. Pull out the distributor. It will be a tight fit.
You may need to remove the dizzy cap to enable you more room.
4) Norm: You will see the external O-ring on the base of
the shaft. It is fairly obvious how to replace it. Just roll
it off - then lightly lubricate the new one and roll it back
on.

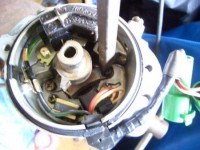
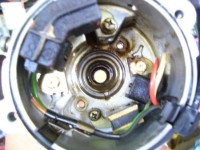
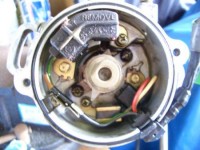
5 ) Now - look inside the distributor where the electrical
parts and rotor are. Is it oily, or is it nice and clean.
If it's nice and clean - skip to the reinstall phase, step
12.
6) Norm: If it is not clean - icky with dirty oil and such
- the inner O-ring needs to be replaced. You will need to
drill, and then drive out the pin that locates the gear on
the shaft. I recommend mounting the distributor in a vise
and using a drill bit that is bout 1.5 mm smaller in diameter
than the pin. Mark the position of the gear on the shaft with
a sharpie or a scratch awl. When you have a hole through the
center of the pin, or at least about half way through, you
can use a drift the size of the pin to drive it out.
Verno: Once you get the pin out remove the gear (you marked
it, didn't you.) then you are set to pull out the shaft.
You may have a hard time getting the gear off the shaft.
If this so happens to you, try this suggestion by MACE from
the MR2 Owners Club. "I
used two open end wrenches to work my drilled gear off the
varnished shaft. Put the wrenches like so, and then spread
them apart to lever the gear loose."
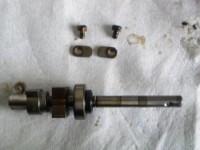
7) There are two hold downs (green) that hold the bearing
and shaft in place before you can pull out the shaft:

Take out the screws:

These are what they (the hold downs) look like out of the
dist. Dirty and gunky huh?

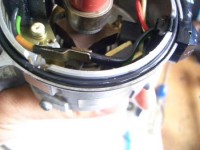
8) Hold the distributor with the cap end facing up (so you
pull "up" on the shaft). Make sure when you pull
the shaft out that NOTHING gets disturbed on the top end -
those little field pickups are VERY picky about where they
are.
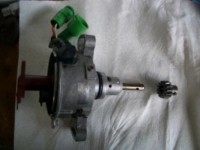
The following pictures are of the freshly removed shaft and
what the now shaftless Dist. looks like inside:
Now before you do anything else make sure you get this stuff
from K-Box
9) The pic shows, from left to right, the housing seal, the
shaft seal, and an o-ring for the green female connector.
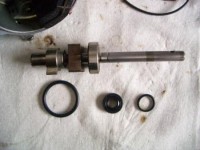
10) Norm: Once the shaft is out, you can roll the inner O-ring
off, and then lubricate and roll the new one back on.
Then CAREFULLY reinsert the shaft into the housing. Once the
shaft seats, you can replace the gear (align the marks) and
drive the roll pin (provided in the kit) in to hold it in
place. You are ready to reinstall it.
11) Norm: Make sure the distributor shaft turns freely, and
has no excessive free-play. There is a dimple in the distributor
shaft (near the pin) and one on the housing..)(Verno: the
dimples are aligned in the step #4 pic) Line those marks up.
Holding the rotor stationary (very important), turn the distributor
to where the rotor is pointing at the ground. Insert the distributor
- and still holding the rotor stationary with respect to the
housing slide it in. As you do, it will rotate about 60* clockwise.
Again, make sure the rotor doesn't turn with respect to the
housing (it will turn with respect to the motor). Once it
is in, check to see if the bolt holes line up. If they do,
you're almost done. If they don't note how much they are off
and pull it out and try agian, adjusting for the amount of
error. (Note: If you do this part right, you should have no
problem starting the engine and re-timing it. In fact, if
you mark base with respect to one of the bolts before you
loosen it, and line everything back up right, you shouldn't
even have to set the timing.)When you've done this insert
the bolts and tighten them just past finger tight. Reconnect
the electrical plugs.
12) Norm: Look at the bottom of the distributor cap, there
should be another large O-ring around the base - where it
sits on the distributor. If there is, replace it - if there
isn't put the new one from the kit in there.
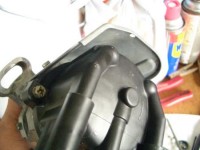
13) Norm: Then reinstall the distributor cap (or - it might
be a good time to think about replacing it).
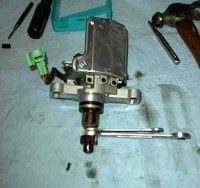
Verno: Pic here is with the cap as well as the heatshield
installed
14) Norm: Start the car.
Time it. Torque the distributor hold-down bolts. Clean
up the area and close the engine cover. Have a beer.
Verno: There you go, now that wasn's so bad.
|

)
)
)
)
)
)
)
)
)
)
)
)
)
)
)
)